
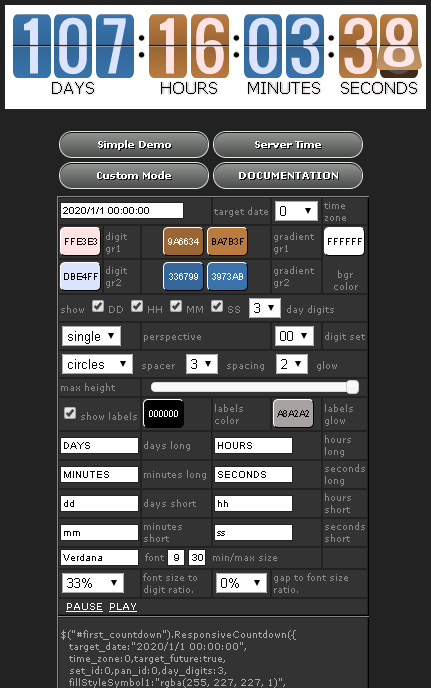
fig. 1
If you have any questions that are beyond the scope of this help file, please feel free to email via my user page contact form here.
jQuery Responsive Countdown is a tool that gives you the ability to create a nice looking countdown, which uses flipping animation to display remaining time to a target date. Since it is based on the canvas object it cannot run natively in older browsers like IE8. The tool uses SVG data to draw the digits and the panels, so it is scalable and looks nice on larger resolutions too. It does not use images, so it is very easy to change colors and adapt the look of it to the design of your page. The tool has a large list of options, but it can also be activated with few lines of code.
In this tutorial I will show you how to add the tool to a coming soon page.
Download the countdown package and unzip it in a folder on your web server. Load the index page, which features the Visual Builder.
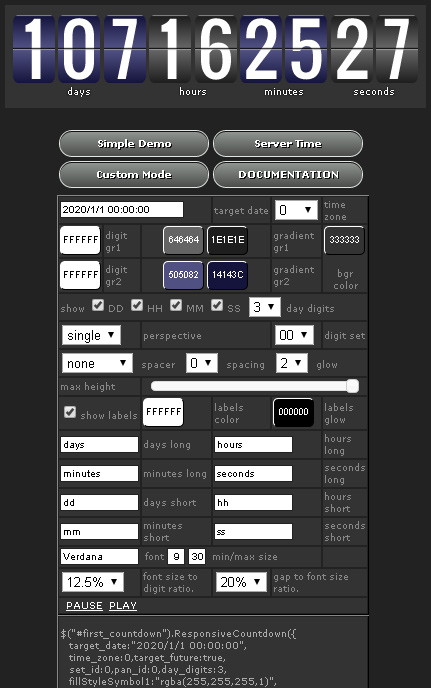
1. Using the Visual Builder you will be able to set the colors and all other options that will make your countdown unique. The tool shows the days, hours, minutes and seconds in two types of groups. Group one is used for the most right positioned group - usually that groups is the seconds group and then for every other group (usually hours). The other group is used alternatively.
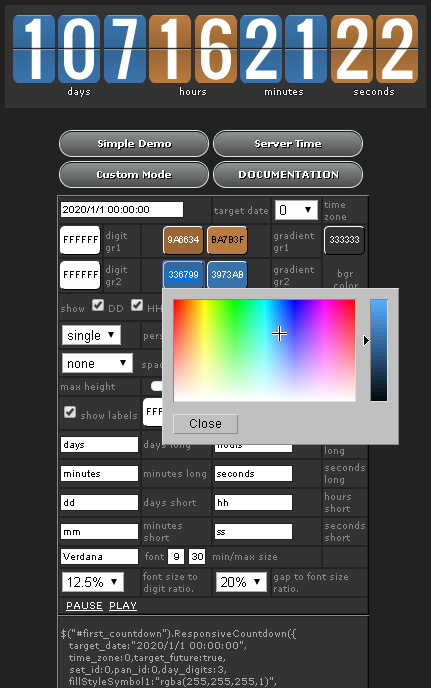
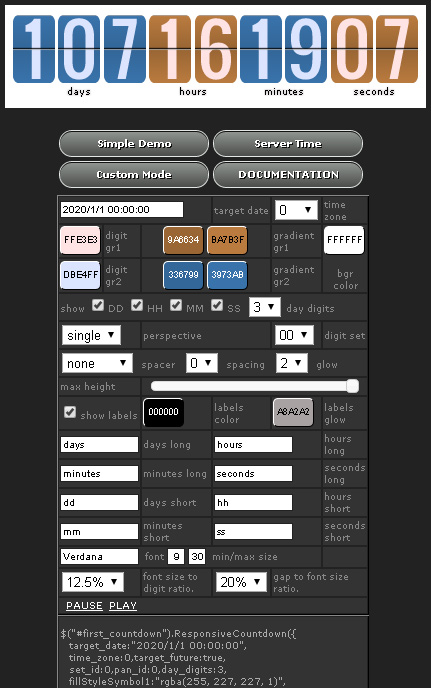
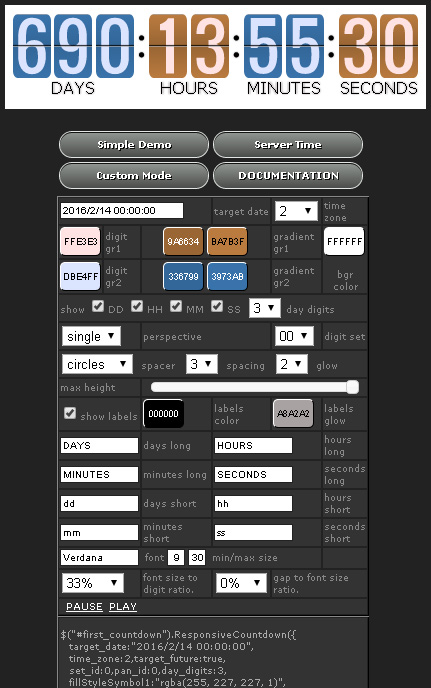
2. For each group you can set the color of the digits (digit gr1, digit gr2) which is solid color. You can also set the color of the panels. Panels can use gradient color (gradient gr1, gradient gr2), or solid color if equal values for each group are entered. The Visual Builder allows the usage of background color, which gives you idea how the countdown will look against the background of your page. Each group can be hidden and number of day digits can be set. Let us imagine that the colors from the image below (fig. 1) are used in your html page design. Using the Visual Builder (fig. 2) the colors of the countdown can changed (fig. 3, fig. 4).
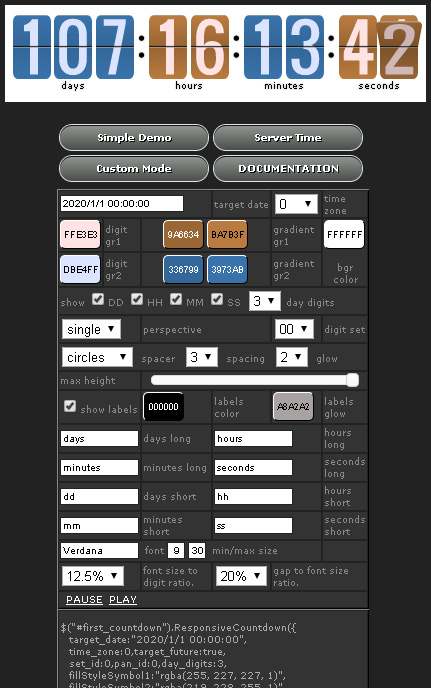
3. Groups can be divided not only by color, but also by space. Normally digits have a bit of space between them, but you can add more between groups (spacing). That option is a number of additional space added to the normal that exists between digits. You can further divide groups by adding a spacer (spacer). It can be circles or squares. The spacer uses the color settings of the labels. Let us use circle dividers and 3x spacing (fig. 5).
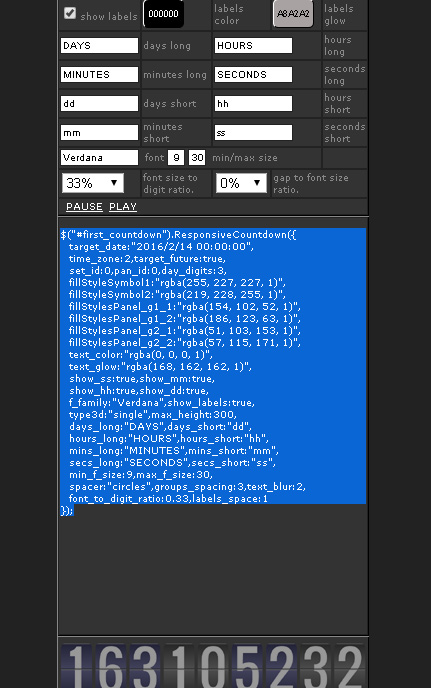
4. Since the countdown resizes within the space available it may become very large. You can use the (max height) option to control the maximum size of it. Labels can be hidden (show labels) and their color (labels color) and glow color (labels glow) can be set. Glow color is used to soften the look of the labels, which in some browsers look too pixelated. Glow can be turned off though using the (glow = 0) option. The labels can have long and short caption. Short caption is used when there is not enough space to show the long caption. The labels resize along with digits, but if they reach the minimum size allowed (min size) the short caption is used. Max size can also be controlled for larger resolutions. Use fonts that are web friendly. The font size is calculated based on the size of the digits. So you need to set a percentage value. The gap above the labels that separates them from the digits is again set as a percentage but this time based on the size of the labels. Let for our example use these labels: DAYS, HOURS, MINUTES, SECONDS and set 33% for font size and 0% for gap (fig. 6).
5. Very important option to set is the target date and time zone. Let us imagine that we are creating coming soon page that will be live on the 14th of February 2016. Setting the time zone allows people from different portions of the world to see same time remaining to your target date. You can set it to your time zone or for example to the time zone where your site will be hosted. I will set time zone 2 for this example (fig. 7)
Import these in the head section of your page.
<script src="http://code.jquery.com/jquery-1.9.1.js"></script>
<script type="text/javascript" src="jquery.responsive_countdown.js"></script>
The tool needs a container to display in. For our example it can be a div element with 100% width. That means the countdown will try to cover all available browser width. Only the maximum height can prevent it from taking all available width for large resolutions. The div needs to have an id, which will be used when the tool is created. Another important setting is the relative position of the div. This is a must because the countdown creates absolutely positioned canvas elements.
<div id="first_countdown" style="position: relative; width: 100%; height: 50px;"></div>
The Visual Builder outputs the needed javascript code for countdown creation and activation. You need to select that text and use it (fig. 8). Note that the id of the div you created matches the one used in the selector (first_countdown). You can paste that code in the body or in the head of your page.
<script>
  $(function() {
    $("#first_countdown").ResponsiveCountdown({
      target_date:"2016/2/14 00:00:00",
      time_zone:2,target_future:true,
      set_id:0,pan_id:0,day_digits:3,
      fillStyleSymbol1:"rgba(255, 227, 227, 1)",
      fillStyleSymbol2:"rgba(219, 228, 255, 1)",
      fillStylesPanel_g1_1:"rgba(154, 102, 52, 1)",
      fillStylesPanel_g1_2:"rgba(186, 123, 63, 1)",
      fillStylesPanel_g2_1:"rgba(51, 103, 153, 1)",
      fillStylesPanel_g2_2:"rgba(57, 115, 171, 1)",
      text_color:"rgba(0, 0, 0, 1)",
      text_glow:"rgba(168, 162, 162, 1)",
      show_ss:true,show_mm:true,
      show_hh:true,show_dd:true,
      f_family:"Verdana",show_labels:true,
      type3d:"single",max_height:300,
      days_long:"DAYS",days_short:"dd",
      hours_long:"HOURS",hours_short:"hh",
      mins_long:"MINUTES",mins_short:"mm",
      secs_long:"SECONDS",secs_short:"ss",
      min_f_size:9,max_f_size:30,
      spacer:"circles",groups_spacing:3,text_blur:2,
      font_to_digit_ratio:0.33,labels_space:1
    });
  });
</script>
The countdown can be used to show elapsed time too. It also has a custom mode, where it waits for outside calls that change the states of its digits. The tool has another set of digits. Different sets can be added easily using some SVG descriptions. Full documentation is available at jQuery Responsive Countdown Documentation. The tool is available at jQuery Responsive Countdown with Visual Builder.
If you have any questions that are beyond the scope of this help file, please feel free to email via my user page contact form here.